After failing my first attempt of the end credits and the old style of patients and schematics wasn’t working really well for the title sequence, I decided to develop the old style of patients and schematics for the end credits. I wanted to almost create the style of how the nanobots have developed and how they have came to being. Still taking inspiration from this idea
and replacing the numbers and letters as the names of cast, crew, extra’s etc.
This is what I was able to create.
Overall I was really pleased an thrilled with how it turned out. However, my director did not approve of the idea and felt it did not fit in really well with the film. He did not want me to pursue the idea of seeing the inside of the nanobot’s and what they look like from inside or outside.
With this in mind, I decided to go back to the drawing board to think and research into possible end credits that could be plain, simple and glitching.
After researching into futuristic schematic designs and patient idea’s, I decided to have a go and create a short section of what it could possibly look like.
From my research and development that I did, I really liked the idea from the ‘GO BAG’ end title sequence where they had a wire frame of all the objects that their main character was carrying in her bag. What they wanted to create was almost an x-ray into the bag and seeing the objects almost like the scanners and conveyor belts at a airport.
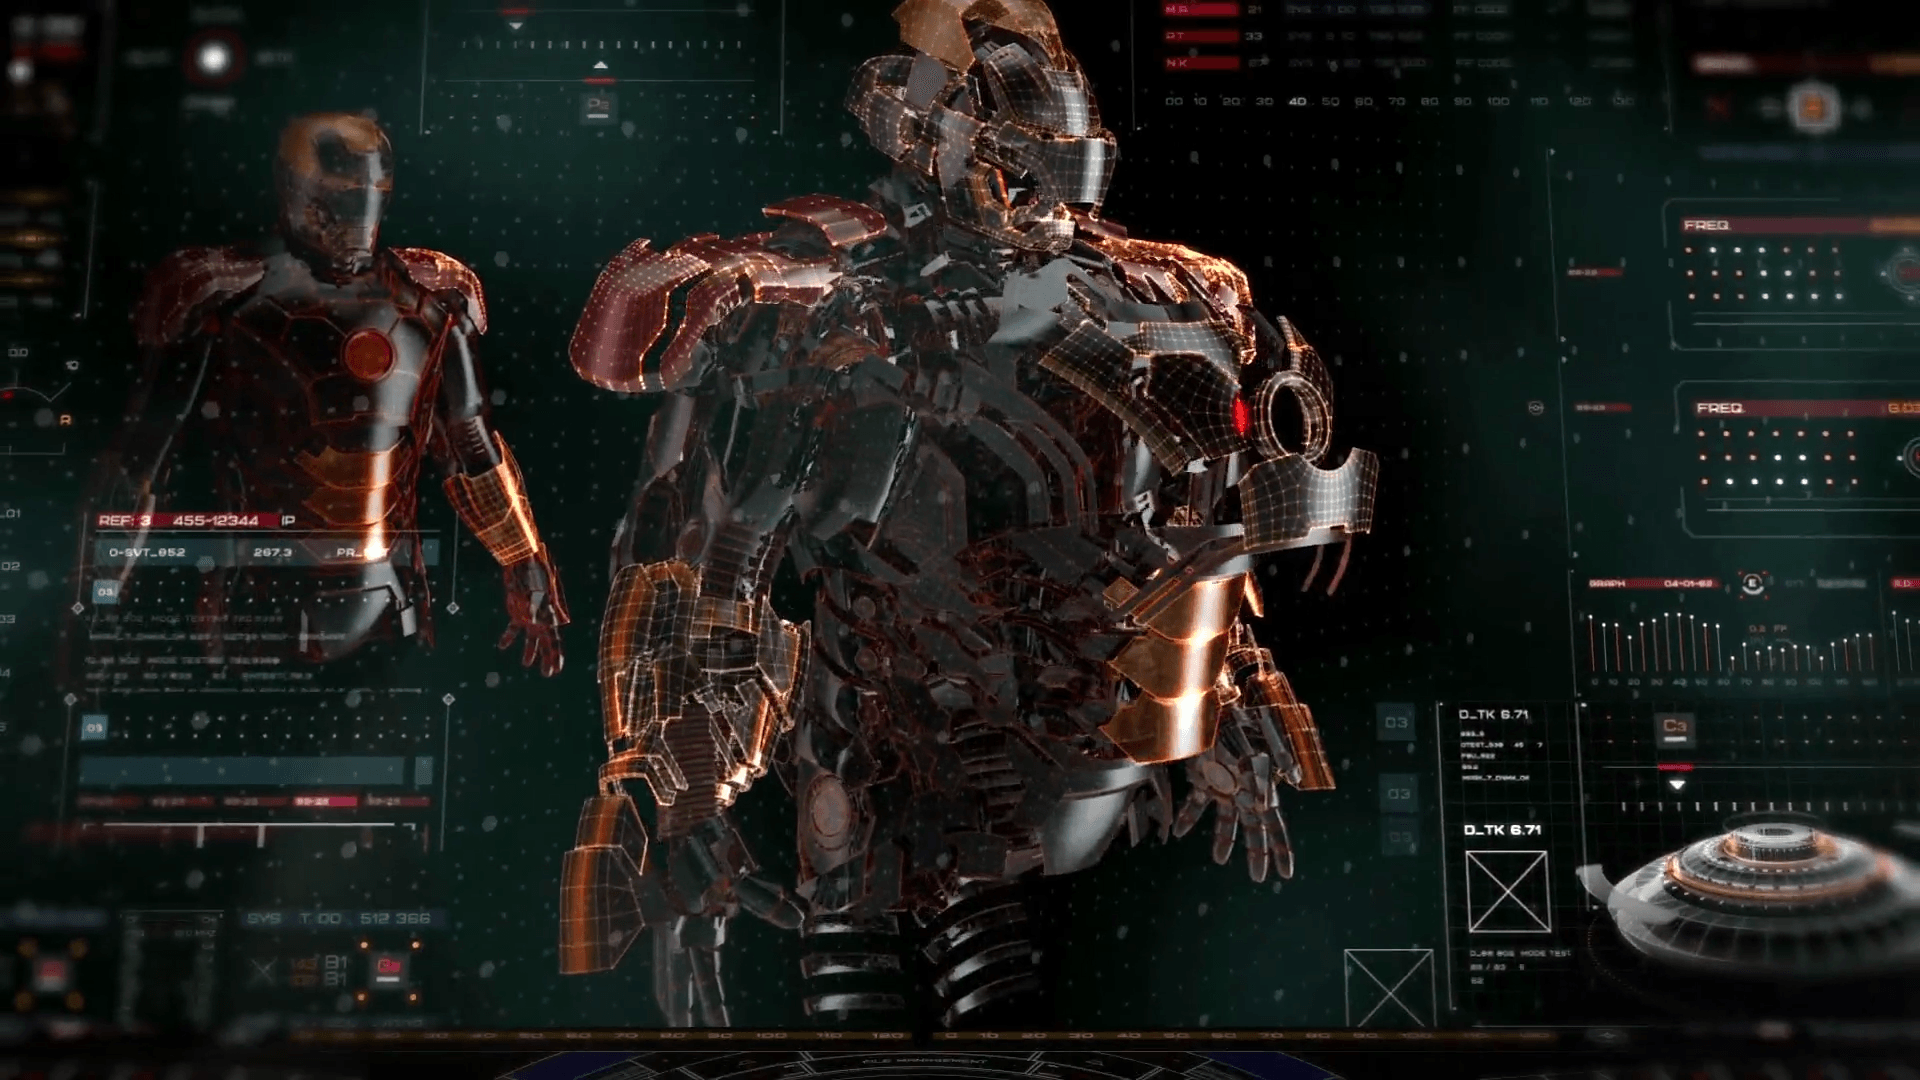
I also like the idea that Territory studios did which was a breakdown of the Iron Man suit. I personally wanted to combine the two ideas together seeing an x-ray of the nanobot then breaking it’s components to see its circuitry and microchips which are inside the nanobot.
To create the wire frames I used the trap code plug in form where you can import Obj. files into After effects. This means that if I could create the nanobot from a 3D software such as Maya, cinema 4D or Blender and saved it as an Obj. file I could import my 3D model into After effects and would be completely view-able 3D in After effects. However, as this was a test just to see if it was possible and to try and get the look I wanted to achieve, I asked our 3D modeler, Samantha Dos Santos, if she had anything robotronic or nanobot like. Sam provided me with this nanochip she modeled for someone else and gave me permission to use as a test and nothing else, which to me was perfectly fine.
I started immediately creating what I would like to see if this was going to the be end credits.
Personally I felt it was a good try and was definitely close to the idea of both GO BAG x-ray style and the Iron Man breakdown of the equipment so we could see what was inside it. However, I felt it was very difficult to use and manoeuver around and would crash quite frequently, which I felt was not worth it. Trying to think about and create all the element and circuity of the nanobots would have been incredibly difficult and time consuming to do which lead me to pursue another idea for the end credits.
While researching I came across this short film called GO BAG. What really stood out to me was the end credit title sequence as they had wireframe 3D objects and almost an x-ray style looking into objects.
I did some research and found out the end title sequence was created by the famous Territory Studio’s who specialise in motion graphics and did a making of video.
I really liked the idea of having wireframes of the objects and showing us in great detail the objects. Another project I saw that caught my eye was the Iron Man suit deconstruction and construction.
I then thought what if I combine the two together having a wireframe body of the object and then deconstruction and construction of objects that show the nanobots in a futuristic patent/schematic.
Iron Man suit deconstuctingIron Man suit leg constructing – part 1Iron Man suit leg constructing – part 2Iron Man suit leg constructing – part 3
I felt that this was going to be a really ambitious and difficult style to achieve but I want to push myself and see how far I can take it and see if I could actually achieve this style.
At the beginning of the title sequence we need to see the pill being digested and dissolving letting the nanobots out. To me, this was going to be a very difficult and tricky scene to achieve. I first did some research into throats and how do things digest and move around the body. Most of the answers I came across were linked when I did my research into the title sequence for lungs and oxygen and carbon dioxide is passed through the tiny air bags to the hemoglobin, to me, this was how the nanobots would travel around and move around fixing our protagonists body from the inside.
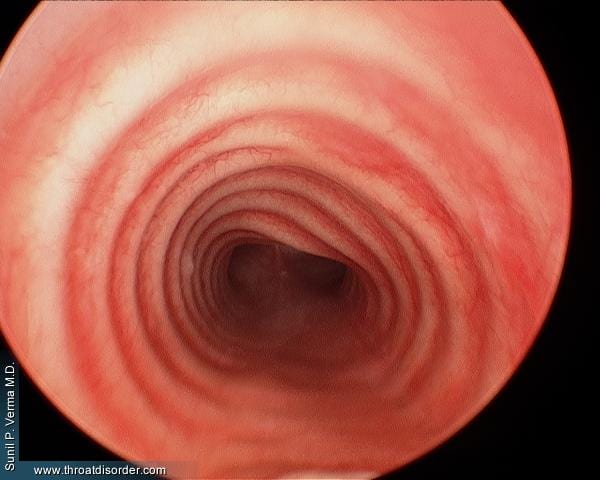
I then did further research into the throat to see what it looks like from the inside and out and found some very graphic photographs and footage.
Inside the throat or trachea as its better known.
Video is very graphical!
outside the trachea/throat
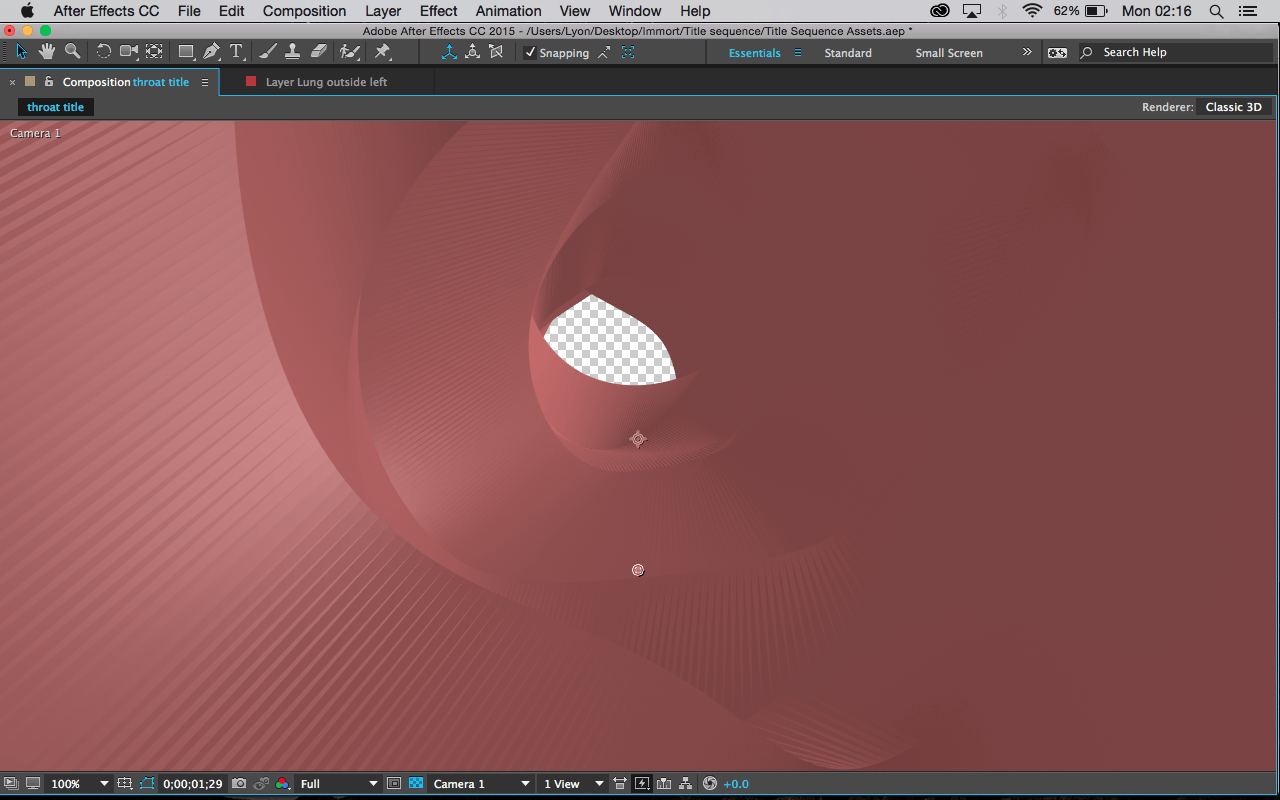
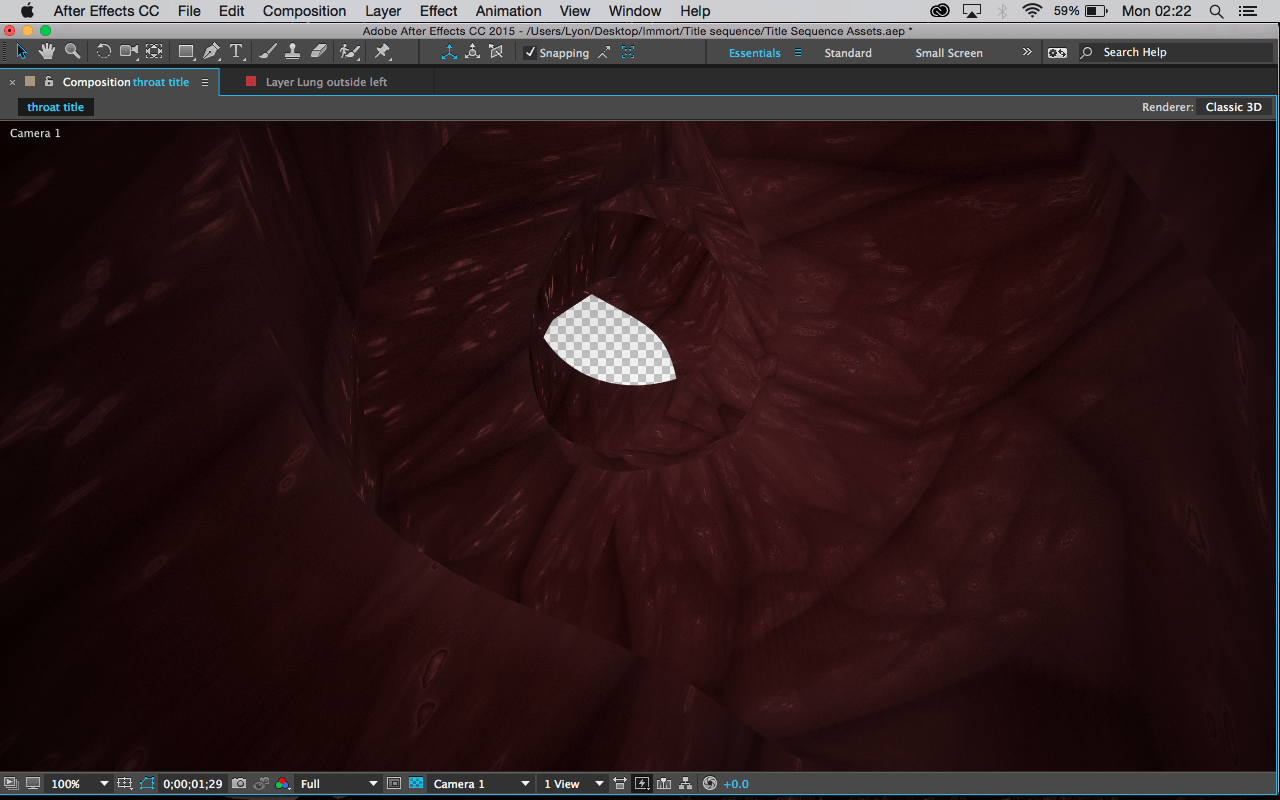
After researching inside and outside throats, I decided to give a go at building a throat to see how easy it would be and if it looked any good.
I remembered that I had the plug-in from Trapcode called Tao where you can make spherical objects within After Effects. So what I did was elongate the spherical object to become a cylinder then I played with segments inside the cylinder which gave me this.
I gave it the pink/red colour to make it more like a throat but thought it needs to have depth and an almost flesh texture. In the plug-in there is a tab called textures where you can use pictures to wrap around the object so I found one off google just to see how it looked.
Meat texture
Applied the meat texture.
meat texture results
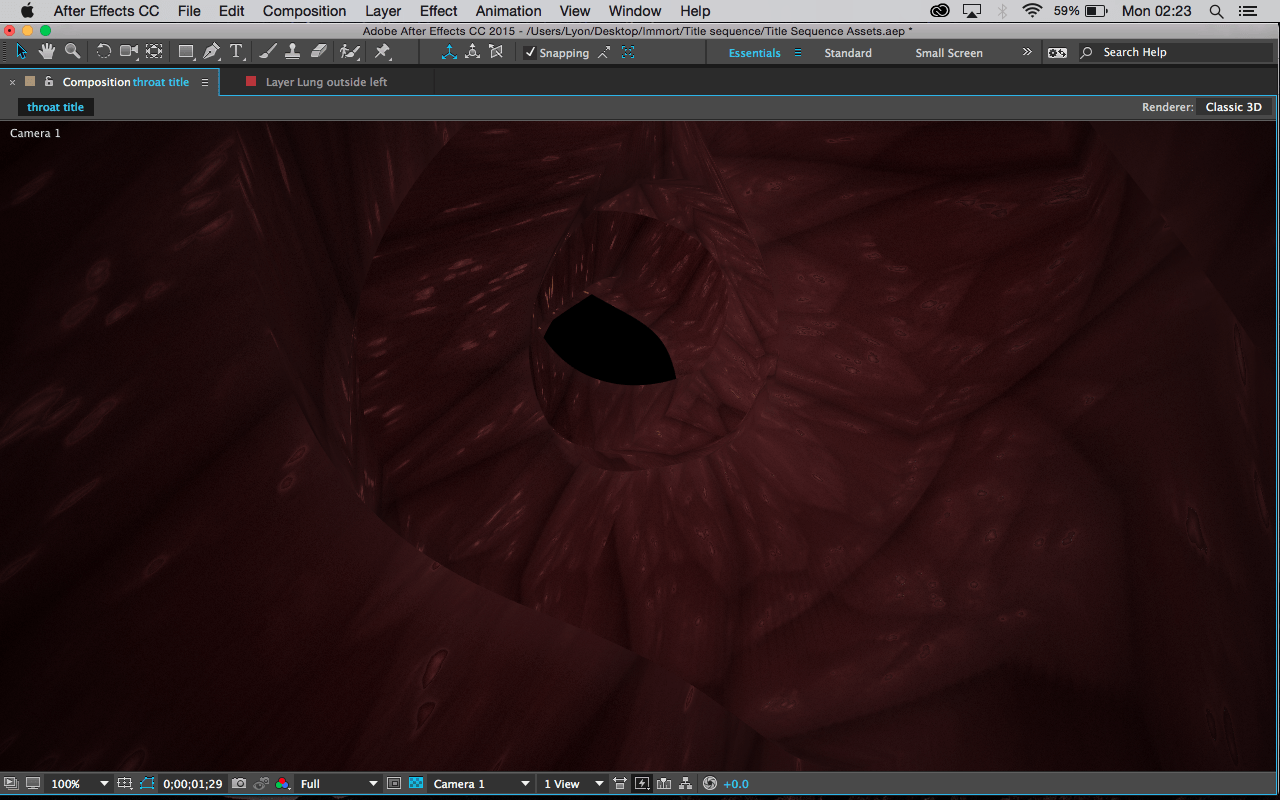
I then applied a vignette around the camera
vignette applied
Plugged up the whole at the bottom with a black background
hole plugged
I then animated the camera traveling down the throat and created a simple pill again using the plug-in ‘Tao’ and made a round object and coloured it in white just to give me a idea of what it would look like traveling down.
This is the result. Overall I am really happy it worked and that I was able to pull all this together and that it does almost look like a throat. Obviously, the pill will be different and will dissolve better and will see nanobots coming out from it.
I also think I need to sort out the black background I created just to give me a rough view of what it would be like and need to either elongate and possibly bend the throat down as it will give the impression its traveling down her body.
Also possibly adding very fine speckle could be quite effective but need to see if it works or if it will make the scene a bit too crowded.
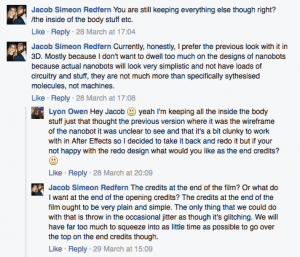
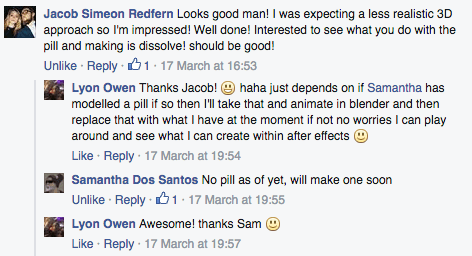
I also posted it on LSFM Digibods page and got some feedback from my director.
In the title sequence I have two sections that are schematic/patent design ideas that will be used as a break away from the human body to show the audience what is inside a nanobot and give us background into nanobos.
My idea in the title sequence is to show to the audience what is inside a nanobot and how they are deconstructed and constructed.
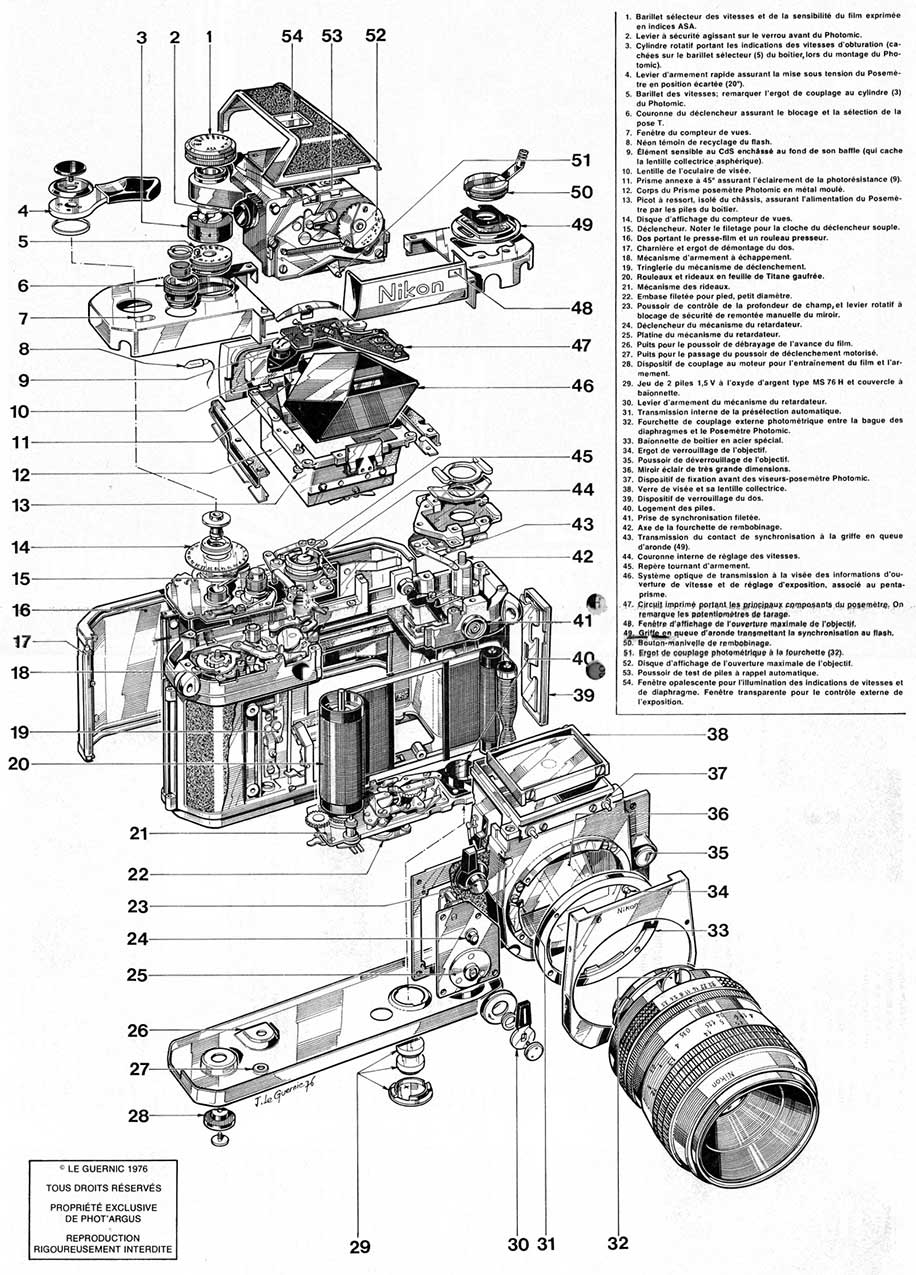
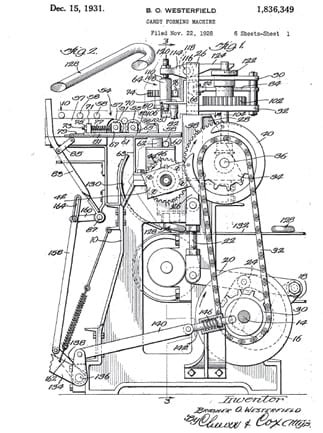
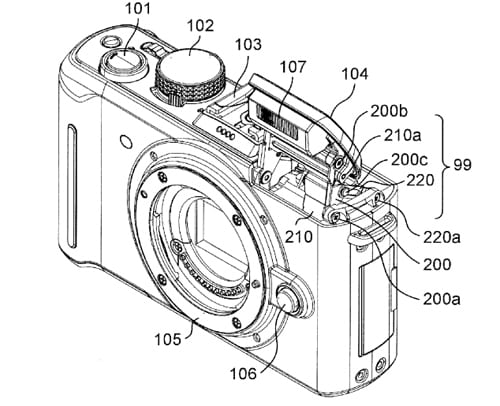
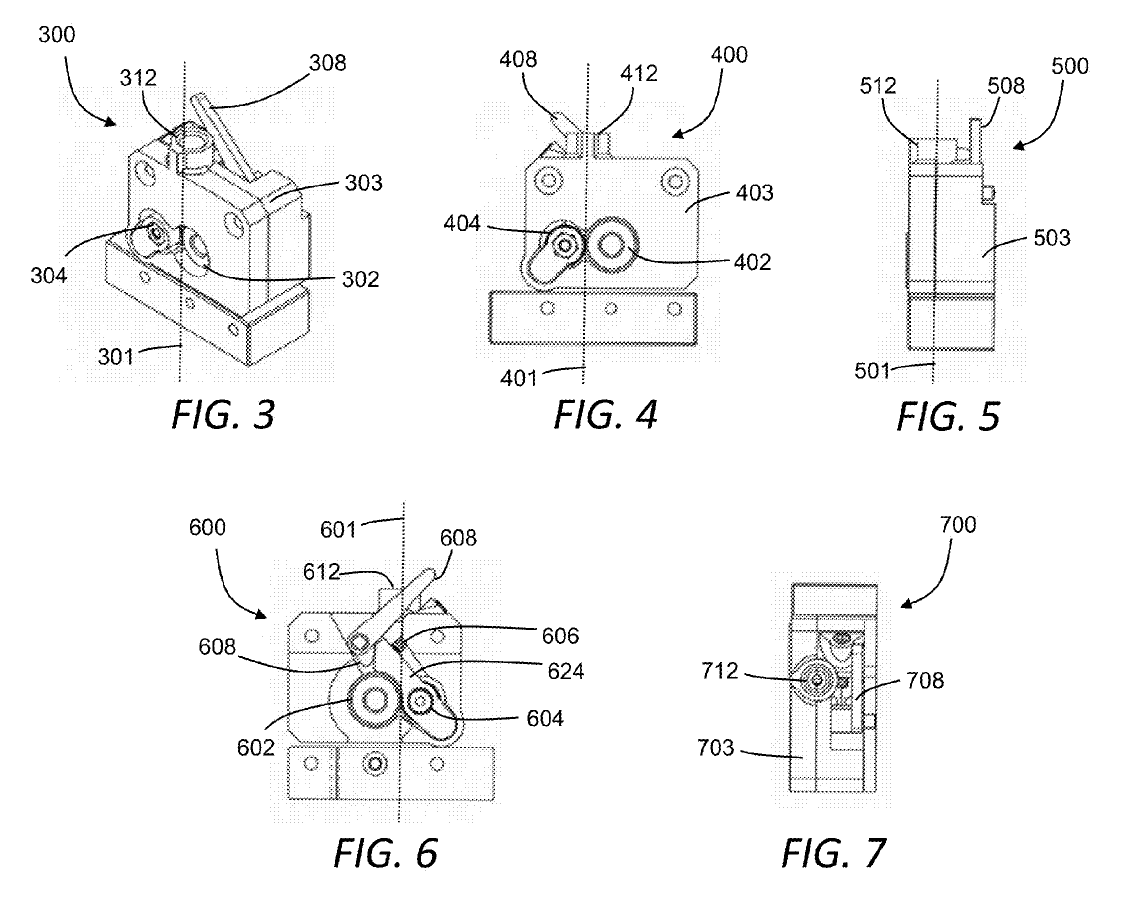
camera Schematic (shows all the bells and whistles inside the camera)Schematic design for some sort of machine.
Camera patentpatent designs all different angles
The whole schematic and patent idea, I feel, would work really well and quite cleave and fun in a way with arrows been drawn on and seeing the schematic and patent deconstruct and reconstruct to become one thing. Again, giving perception and depth to the objects as they travel in Z space.
Almost like this video but being much more obscure about each component.